
There’s something magical about the smell of freshly baked bread filling your home. It’s warm, cozy, and oddly satisfying — like a hug from your kitchen. But let’s be real: making perfect homemade bread isn’t always easy. Sometimes it’s too dense, sometimes it doesn’t rise, and sometimes it just doesn’t taste quite right.
So today, let’s uncover 7 simple but powerful secrets that can help you bake bread that’s soft, golden, and delicious — every single time.
1. Use the right flour (it truly matters)
Here’s the truth: not all flours are equal. If you’ve ever wondered why your bread feels heavy or dry, the flour could be the main culprit.
For soft, fluffy bread, use bread flour instead of all-purpose flour. Bread flour has higher protein content (around 12–14%), which gives your dough the strength to rise better and hold air pockets — that’s how you get that soft, pillowy texture.
But here’s a little tip: if you want a lighter loaf with a slightly tender crumb, try mixing half bread flour and half all-purpose flour. It gives the best of both worlds.
| Flour Type | Protein % | Best For | Texture |
|---|---|---|---|
| Bread Flour | 12–14% | Yeast breads | Chewy, structured |
| All-Purpose Flour | 10–12% | Everyday baking | Softer, lighter |
| Whole Wheat Flour | 13–15% | Hearty breads | Dense, earthy flavor |
👉 Pro tip: Always store your flour in a cool, dry place, and if it smells musty or stale, don’t use it. Old flour kills your bread dreams instantly.
2. Don’t rush the yeast — let it breathe
Yeast is alive. It needs warmth, food, and time. Many beginners make the mistake of adding yeast directly to cold water or salt — and that’s a recipe for disaster.
Always activate your yeast first in slightly warm water (around 105°F–110°F) with a bit of sugar. If you see it bubbling and foaming after 5–10 minutes, you know it’s alive and ready to work its magic.
If nothing happens, toss it and start over. Dead yeast = flat bread.
Another secret? Don’t rush fermentation. Let your dough rise slowly. If you’re patient, the yeast develops deeper flavors and better texture.
⏳ Slow rise = more flavor, more softness, and longer shelf life.
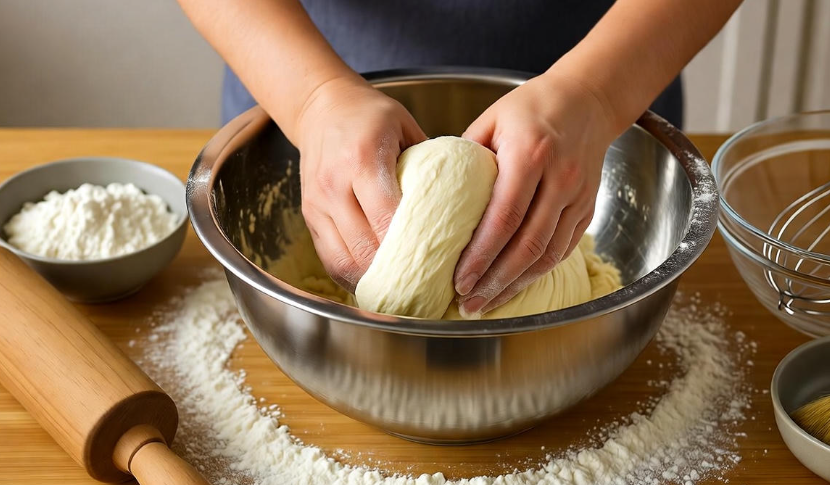
3. Knead like you mean it (but don’t overdo it)
Ah, kneading — the part that looks easy until your arms start to ache. 😅
Kneading develops gluten, which gives your bread its structure and chewiness.
Here’s how to know when your dough is “just right”:
-
It should be smooth and elastic, not sticky.
-
When you press it lightly, it should bounce back slowly.
If you’re using a stand mixer, knead for about 8–10 minutes.
If by hand, around 12–15 minutes should do the trick.
But be careful — over-kneading makes the bread tough. Once the dough feels soft and bouncy, stop. Trust your hands more than your timer.
4. Perfect proofing makes or breaks your loaf
This one’s HUGE. You can follow every step perfectly, but if you skip proper proofing, your bread will turn out dense.
The dough needs time to rest and rise — this is called proofing.
During proofing, the yeast produces gas, which makes your bread airy.
Here’s a little trick:
To check if your dough has proofed enough, poke it gently with your finger.
If the dent slowly bounces back halfway, it’s perfect.
If it springs back instantly — needs more time.
If it doesn’t bounce at all — it’s over-proofed.
The right environment matters too. Keep your dough in a warm, draft-free place.
You can even preheat your oven for 1 minute, turn it off, and put your dough inside (covered). That creates a perfect proofing chamber.
5. The magic of steam and scoring 🌫️
Ever noticed that beautiful golden crust on bakery bread? That’s steam at work!
When you bake bread, steam helps keep the surface moist so the dough can rise before forming a crust.
To create steam at home, try this:
-
Place a small metal pan of hot water at the bottom of your oven.
-
Or, spritz the inside of the oven with water just before baking.
Another trick is scoring your dough. Use a sharp knife or razor blade to make small cuts on top before baking.
This not only looks artistic but also controls how your bread expands — so it doesn’t tear randomly.
✨ Steam = glossy crust. Scoring = perfect shape.
6. Don’t slice it too soon (the hardest part 😅)
We get it. You pull that beautiful loaf out of the oven, and your kitchen smells divine. The first thing you want to do is slice it, right?
Don’t.
Let it cool completely.
Cutting hot bread releases the trapped steam, which dries out the loaf and ruins its texture.
Give it at least 30–45 minutes to cool. During this time, the inside sets and moisture redistributes evenly.
Patience here pays off — big time.
7. Store it right to keep it fresh longer 🧺
Homemade bread doesn’t have preservatives, so it can dry out quickly. But with proper storage, you can keep it soft and tasty for days.
Here’s what works best:
| Storage Method | Lasts For | Tip |
|---|---|---|
| Room Temperature | 2–3 days | Store in cloth or paper bag |
| Refrigerator | 5–7 days | Wrap in plastic wrap or airtight box |
| Freezer | 1–3 months | Slice before freezing and wrap tightly |
Avoid storing it in the fridge uncovered — it will harden fast.
And when you’re ready to eat, reheat a slice in the oven for a few minutes to revive its softness.
Bonus Tips for Bread Perfection 🥖
-
Always measure ingredients by weight, not cups. (A kitchen scale is your best friend.)
-
Add a touch of oil or butter to keep bread tender.
-
If using whole wheat flour, mix it with white flour to prevent density.
-
Use lukewarm liquids, never cold, when mixing yeast.
Common Bread Problems and Fixes 🔧
| Problem | Likely Cause | Quick Fix |
|---|---|---|
| Bread too dense | Not enough kneading or proofing | Knead longer and allow full rise |
| Crust too hard | Too much oven heat or overbaking | Lower temp slightly or add steam |
| Bread doesn’t rise | Dead yeast or cold dough | Test yeast, keep dough warm |
| Dry bread | Too much flour | Measure accurately, add moisture |
FAQs 🥯
Q1. Why does my homemade bread come out dense and heavy?
Usually, it’s because of under-kneading or not enough proofing time. Make sure your yeast is active and the dough doubles in size before baking.
Q2. Can I use instant yeast instead of active dry yeast?
Yes, absolutely. Just mix instant yeast directly into your flour — no need to activate it in water first.
Q3. How can I make my bread softer?
Add a bit of milk, butter, or honey. They make the crumb softer and keep it fresh longer.
Q4. What’s the best temperature for baking bread?
Most loaves bake perfectly around 375°F–425°F (190°C–220°C) depending on the recipe.
Q5. Why does my bread collapse after baking?
That often happens when it’s over-proofed or the oven is too cool. Try baking as soon as the dough finishes rising.
Final Thought 🌾
Baking bread at home isn’t about perfection — it’s about practice, patience, and a little love. The beauty of homemade bread lies in its imperfections: the rustic crust, the uneven shape, the smell that fills your kitchen.
So next time you bake, remember these 7 secrets. Let your dough rest, treat the yeast kindly, and don’t be afraid to get your hands messy.
Because honestly, nothing tastes better than a loaf baked with care — by you. ❤️
Time to check out b77bet and see what it’s all about. Maybe tonight’s the night I win big! Lets go! b77bet