There’s something magical about bread dough. You mix a few simple things — flour, water, yeast, and salt — and somehow it turns into a soft, fluffy loaf that smells like home. But behind that warm, cozy smell lies pure science. And one of the most fascinating (and often misunderstood) parts of bread-making is proofing.
If you’ve ever baked bread and wondered why sometimes it’s soft and airy while other times it turns out dense and heavy, it all comes down to how well the dough was proofed.
Let’s dig into the real science behind proofing — in a way that actually makes sense, no chemistry degree needed.
What proofing really means 🍞
Proofing, also called fermentation, is the stage when the yeast in your dough eats the sugars and releases carbon dioxide gas. This gas gets trapped in the dough’s gluten structure, making it rise. Think of it like little balloons of air being blown up inside your dough.
But it’s not just about rising. Proofing changes the dough in several ways:
-
It develops flavor (that slightly tangy, complex bread taste).
-
It improves texture (soft and springy instead of tough).
-
It strengthens the gluten network.
-
And it creates that perfect crumb — the inside pattern of holes that makes bread feel “right.”
So yeah, it’s not just a waiting game. It’s a science experiment happening right in your kitchen.
The role of yeast 🧫
Yeast is the tiny hero here — a living microorganism that works like a natural engine for bread. When you mix it with water and flour, it wakes up and starts feeding on simple sugars.
During this process, yeast does two major things:
-
Releases carbon dioxide (CO₂) → This gas inflates the dough.
-
Produces alcohol and acids → These give bread its distinct aroma and flavor.
That’s why freshly baked bread smells so irresistible — it’s a mix of yeast fermentation byproducts that humans just happen to love.
If your dough doesn’t proof properly, the yeast might have been overworked, underfed, or simply too cold (or hot).
Temperature and time – the two secret ingredients 🌡️⏰
Here’s where most people go wrong. They either rush proofing or let it sit too long. The balance between temperature and time determines everything.
| Temperature (°C) | Proofing Time | Result |
|---|---|---|
| 20°C (cool room) | 2–3 hours | Slow fermentation, rich flavor |
| 25°C (warm room) | 1–1.5 hours | Ideal proofing speed |
| 30°C (hot) | 30–45 minutes | Quick rise but less flavor |
When the dough is too warm, the yeast becomes hyperactive — it rises fast, but you lose flavor.
When it’s too cold, yeast works slowly, which actually helps flavor but takes more time.
Many professional bakers proof dough slowly in the fridge (a process called cold fermentation) for 12–24 hours. That’s how you get that deep, bakery-style taste at home.
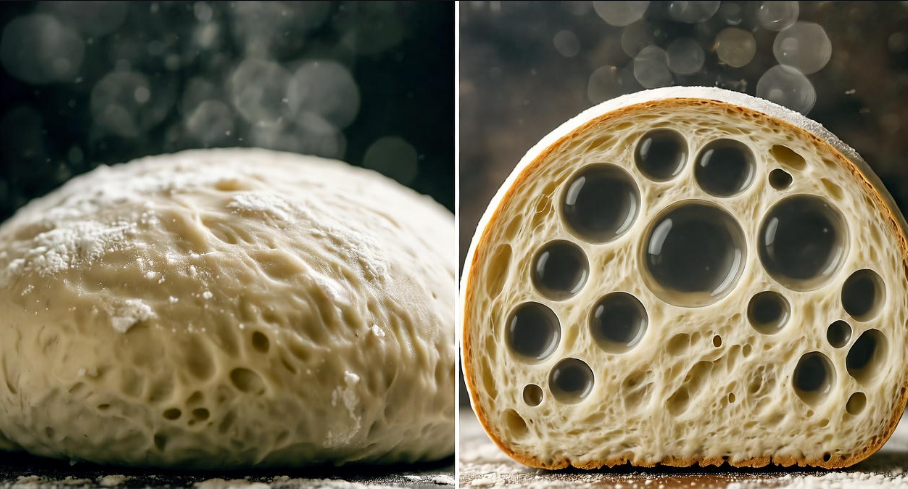
Understanding gluten – the dough’s skeleton 🧩
Gluten is the stretchy network that traps all that gas from the yeast. Without it, your dough would just collapse like a popped balloon.
When you knead dough, you’re helping gluten proteins (gliadin and glutenin) align and form bonds. During proofing, the gas from yeast gets trapped inside these stretchy pockets.
If you don’t knead enough → gluten isn’t developed → gas escapes → flat bread.
If you knead too much → dough becomes tough → bread feels chewy.
Finding that sweet spot of elasticity is the trick.
You can test this using the “windowpane test.” Take a small piece of dough, stretch it gently. If it forms a thin, translucent membrane without tearing — gluten is just right.
First and second proofing – yes, it matters! 🍞➡️🍞
Bread dough usually needs to rise twice. Let’s break it down.
First proof (bulk fermentation):
This is when all the yeast activity begins. The dough doubles in size as CO₂ builds up. You punch it down after this stage to release big air pockets.
Second proof (final rise):
After shaping your dough into loaves or rolls, you let it rise again. This proof shapes the bread’s final texture and structure.
Skipping the second proof is one of the biggest beginner mistakes — it’s like taking a nap halfway through a marathon and expecting to win the race.
Over-proofing vs. under-proofing ⚖️
This is where timing gets tricky. Both over-proofed and under-proofed doughs can ruin your bread, but in different ways.
| Condition | What Happens | Bread Result |
|---|---|---|
| Under-proofed | Yeast didn’t have enough time to produce gas | Dense, compact crumb |
| Over-proofed | Gas escaped and gluten weakened | Flat top, sour taste, collapsed loaf |
So, how do you know it’s just right?
Try the poke test:
Gently press your finger into the dough.
-
If it springs back immediately → under-proofed.
-
If it doesn’t move at all → over-proofed.
-
If it slowly springs back halfway → perfect. 👌
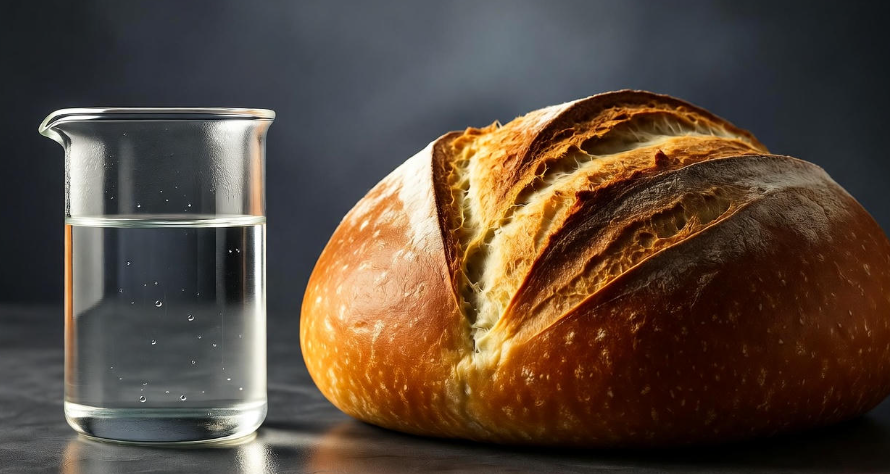
Humidity – the invisible helper 💧
Yeast loves moisture. That’s why covering dough with a damp cloth or plastic wrap helps prevent the surface from drying out during proofing.
In a dry room, the outer layer can form a crust, stopping the dough from expanding properly.
Some bakers proof dough in a slightly warm, humid oven (by placing a bowl of hot water inside).
It’s like creating a mini weather system just for your bread.
Why does dough sometimes smell sour?
If your dough smells overly sour or alcoholic, it’s usually a sign of over-fermentation. Yeast and bacteria have gone too far, producing excess acids and alcohols.
A mild tang is normal — that’s what gives flavor — but a strong smell means it’s been sitting out too long or at too high a temperature.
The role of salt and sugar 🧂🍬
Most people think of salt and sugar as just taste enhancers, but they’re chemical regulators in proofing.
-
Salt strengthens gluten and controls yeast activity (slowing fermentation so flavor develops evenly).
-
Sugar feeds the yeast, giving it more energy to produce CO₂, especially in sweet breads.
Without salt, dough can become sticky and overactive. Without sugar, yeast might work too slowly. It’s all a balancing act.
The oven spring – the final rise 🔥
When you finally put your dough into the hot oven, something amazing happens — it rises again. This is called oven spring.
In the first few minutes of baking, the heat makes yeast go into overdrive, releasing one last burst of gas. Meanwhile, the dough’s outer layer begins to solidify, trapping those bubbles in place.
After about 10 minutes, the yeast dies from the heat, and the structure sets — that’s when your bread locks in its shape.
If your dough was proofed correctly, you’ll get a beautiful dome shape with a soft interior. If not, it may spread out instead of rising up.
Tips for perfect proofing every time ✅
-
Use lukewarm water (around 35°C) — too hot kills yeast.
-
Proof in a draft-free place — yeast hates sudden temperature changes.
-
Use the poke test instead of guessing.
-
Don’t rush the process — great bread needs patience.
-
If unsure, proof longer in the fridge overnight for better flavor.
A simple way to visualize proofing
Here’s a quick comparison table that shows how dough changes over time during proofing:
| Stage | Yeast Activity | Gluten Strength | Dough Texture | Flavor |
|---|---|---|---|---|
| 0–30 min | Wakes up | Weak | Sticky | Bland |
| 1–2 hrs | Active | Stretchy | Soft, elastic | Slightly sweet |
| 4–8 hrs (slow proof) | Moderate | Strong | Smooth | Deep, rich flavor |
| Over 10 hrs | Declining | Weak | Overly soft | Sour |
This visual helps you understand why “slow and steady” proofing often wins the flavor race.
Troubleshooting common proofing problems 😩
-
My dough didn’t rise: Yeast might be dead (expired or killed by hot water). Try again with fresh yeast and warm (not hot) water.
-
My dough rose too much: Over-proofed. Next time, reduce proofing time or keep it in a cooler spot.
-
Crust formed during proofing: Too dry. Cover it or increase humidity.
-
Uneven texture inside bread: Not kneaded enough or uneven gas pockets — punch down the dough better before shaping.
The science of proofing bread dough 🥖
Why patience makes better bread ❤️
In bread-making, time equals flavor. When you let yeast work slowly, it releases complex acids and alcohols that give that bakery-style aroma.
That’s why handmade, slow-proofed bread tastes richer than supermarket loaves — those are usually rushed with additives.
So, yes, the secret ingredient is patience (and maybe a good playlist while you wait).
FAQs about proofing bread dough 🧐
1. Can I proof dough in the fridge overnight?
Absolutely! That’s called cold fermentation, and it gives you more flavor. Just let the dough come to room temperature before baking.
2. Can I overproof dough in the fridge?
Yes, but it takes much longer. Usually 12–24 hours is safe — after that, the gluten may weaken.
3. What if my kitchen is cold?
Place the dough near a warm appliance or inside the oven with the light on (no heat). It creates a cozy environment for yeast.
4. Should I cover the dough while proofing?
Yes. Always cover it lightly to retain moisture. Plastic wrap or a damp towel works best.
5. Can I skip the second proof?
You can, but you shouldn’t. The second proof makes the bread airy and improves texture. Without it, the bread will be dense.
6. How do I know if the yeast is alive before mixing?
Dissolve it in warm water with a little sugar. If it bubbles within 10 minutes, it’s alive.
Final thoughts 🍞❤️
Proofing is more than just “waiting for the dough to rise.” It’s biology, chemistry, and a bit of art all working together. Every bubble in your dough tells a story of time, temperature, and patience.
The next time you bake, remember — you’re not just making bread. You’re creating a living, breathing thing that transforms under your care. Slow down, enjoy the process, and when that golden loaf comes out of the oven, you’ll taste the science in every bite.