
Have you ever pulled something out of the oven — a pie, a loaf of bread, or maybe roasted veggies — and wondered why it looks pale and dull instead of that perfect golden brown color? Yeah, we’ve all been there. Getting that dreamy golden-brown crust isn’t just about looks — it’s also about flavor, texture, and a satisfying crunch that makes your food taste amazing.
Let’s dive into how to master that irresistible golden color every single time — without turning your kitchen into a science lab.
The secret lies in balance 🔥
Golden crusts happen when heat, moisture, and chemistry work together in harmony. You need enough heat to trigger caramelization and the Maillard reaction (that’s the browning magic between proteins and sugars), but not so much that you burn your food.
If it sounds fancy, don’t worry — it’s actually simple once you understand what’s really going on inside your oven.
Why food browns — the simple science
Here’s the thing: when you heat foods that contain sugars or proteins, they go through two main processes —
| Process | What It Does | Common Foods |
|---|---|---|
| Caramelization | Sugar melts and turns brown, giving sweetness and a nutty aroma. | Pastries, roasted vegetables, caramel sauces |
| Maillard Reaction | Proteins and sugars react, creating deep flavor and golden crust. | Bread, meat, pizza crust, cookies |
So, your goal? Encourage these reactions — without drying out or burning your food.
Start with a dry surface 🧽
One big reason food doesn’t brown is moisture.
If you’ve ever roasted potatoes and they came out soggy instead of crisp, it’s likely because there was too much water on them.
Before cooking, always pat your ingredients dry. For meats, use a paper towel. For veggies, toss them lightly in oil and make sure they aren’t crowded on the pan. Steam equals sogginess; space equals crispness.
Pro Tip: When baking bread, a slightly moist dough before baking helps, but once it hits the oven, you want the surface to dry just enough to brown beautifully.
Oil is your friend (but don’t overdo it) 🫒
A thin layer of fat helps conduct heat and promote even browning. That’s why brushing your bread, pastries, or roasted vegetables with butter or oil gives such a gorgeous finish.
Different fats also affect the flavor and color:
| Fat Type | Flavor | Browning Level | Best For |
|---|---|---|---|
| Butter | Rich, creamy | Medium | Bread crusts, pastries |
| Olive oil | Fruity, light | Medium-high | Vegetables, pizzas |
| Ghee / clarified butter | Nutty, deep | High | Flatbreads, naan, pie crusts |
| Neutral oils (canola, sunflower) | Mild | Medium | Everyday baking or roasting |
If you’re roasting, just coat lightly — you’re going for shine, not grease. A drizzle is often enough.
Don’t crowd your pan 🍲
We all do it — trying to fit just one more potato on the tray. But overcrowding traps steam and prevents browning.
Give each piece some breathing room so the heat can circulate evenly. When too close together, foods steam instead of roast. That’s why restaurant fries come out crisp while homemade ones sometimes go limp — space makes a big difference!
Preheat like a pro 🔥
If your oven or pan isn’t hot enough when the food goes in, it’ll release moisture instead of searing. That’s the opposite of what we want.
Always preheat your oven or skillet properly. For example:
| Food Type | Ideal Starting Temp |
|---|---|
| Bread | 425–475°F (220–245°C) |
| Meat | 375–450°F (190–230°C) |
| Vegetables | 400–450°F (200–230°C) |
| Pies / Pastries | 375–425°F (190–220°C) |
That initial burst of heat is what helps create that brown, crisp crust right from the start.
A touch of sugar goes a long way 🍯
If your doughs or batters look too pale, try adding a little sugar. Even a teaspoon can make a huge difference because sugar helps caramelization.
In bread baking, milk, honey, or egg wash can also enhance browning naturally — no artificial coloring needed.
Quick tip: Brushing your pastries or rolls with a mix of egg yolk and milk before baking gives them that glossy, bakery-style shine.
Steam can actually help — sometimes! 💨
This might sound confusing after we said “keep it dry,” but here’s the trick: Steam is good in the beginning of baking bread because it keeps the crust soft enough to expand.
Then, as baking continues and steam disappears, the crust starts to dry and brown beautifully.
That’s why bakers sometimes spray water into the oven or keep a pan of hot water inside for the first few minutes.
After about 10–15 minutes, though, you want a dry atmosphere again — that’s when browning kicks in.
Use the right bakeware 🧁
The type of pan or tray you use also affects browning. Dark metal pans absorb more heat and promote deeper color. Light or shiny aluminum pans reflect heat and can lead to paler results.
Here’s a quick comparison:
| Bakeware | Heat Effect | Best For |
|---|---|---|
| Dark metal | Faster browning | Cookies, bread |
| Glass | Even heat | Pies, casseroles |
| Ceramic | Retains moisture | Crusty loaves, lasagna |
| Nonstick | Gentle browning | Muffins, cakes |
If you want crispiness — go dark metal. If you want gentle, even baking — go ceramic or glass.
Rotate halfway through 🔁
Not all ovens are created equal. Some heat more at the back, others on the sides. So halfway through your bake, give your pan a little turn. That helps everything brown evenly — no more half-golden, half-pale cookies.
The magic of finishing touches ✨
Once your food is almost done, there are small tricks to enhance color even more:
Brush melted butter or oil in the last 5–10 minutes
For savory dishes, sprinkle a bit of paprika for a golden tint
For sweets, use a light egg wash mid-bake
Toast the top under the broiler for a quick finish (watch closely!)
Sometimes that last little touch makes the difference between “good” and “wow.”
Timing is everything ⏱️
It’s tempting to rush baking or roasting — but golden brown color develops best with patience. Lower heat for longer times creates even caramelization. High heat gives a darker, crispier crust — great for meats or flatbreads.
So always adjust based on what you’re cooking. Think of it like finding the “sweet spot” — not too long, not too hot.
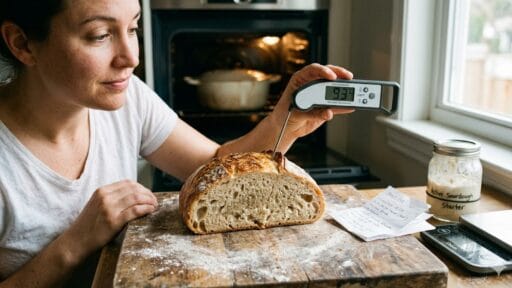
Check your oven truthfully 🔍
Here’s a secret many home cooks don’t realize — most ovens lie.
Yep, your dial might say 400°F, but it’s really 375°F or even 425°F.
Investing in a cheap oven thermometer can change your baking life. When you know your oven’s real temperature, you can adjust and get consistent golden crusts every time.
Rest before serving 🥖
This might sound strange, but letting baked or roasted foods rest for a few minutes after coming out of the oven actually deepens the color slightly. The residual heat continues mild browning and helps moisture redistribute.
So don’t rush — good crusts reward patience.
Common mistakes to avoid ❌
| Mistake | Result | Fix |
|---|---|---|
| Skipping preheat | Pale, uneven color | Always preheat fully |
| Too much moisture | Steamed, soggy food | Pat dry or space out pieces |
| Too little oil | Dull surface | Lightly brush or drizzle oil |
| Overcrowded pan | Uneven cooking | Give each item space |
| Not rotating | One side darker | Turn halfway through |
| Using shiny pans | Slower browning | Try darker bakeware |
Simple example: Perfect golden roasted potatoes 🥔
Here’s a quick recipe-style breakdown:
Peel and cut potatoes evenly.
Boil 5–6 minutes, then drain.
Shake to rough the edges (helps crispiness).
Pat dry completely.
Toss in olive oil, salt, and a touch of paprika.
Spread on a preheated baking tray (400°F).
Roast 35–40 minutes, flipping halfway.
They’ll come out golden, crunchy, and perfect — no magic required.
Bonus: Egg washes that transform baking 🥚
| Wash Type | Ingredients | Effect |
|---|---|---|
| Egg yolk + milk | 1 yolk + 1 tbsp milk | Deep golden, shiny |
| Whole egg + water | 1 egg + 1 tbsp water | Medium shine |
| Milk only | Milk brushed | Soft, light brown |
| Butter (melted) | Unsalted butter | Matte, flavorful |
Different washes give different textures — so you can experiment based on what you’re baking.
Quick checklist for golden brown success ✅
Preheat your oven properly
Dry your ingredients
Add a light coat of fat
Use high heat at the start
Give space for airflow
Rotate midway
Use dark pans for deeper browning
Finish with an egg or butter wash
Follow those, and you’ll never have to wonder why your food looks pale again.
FAQs 🧐
Q1. Why does my bread crust stay pale even after full baking time?
Usually because of low oven temperature or too much steam. Try increasing the temperature by 10–15°C and reduce steam after the first 15 minutes.
Q2. Can I get golden brown crusts in an air fryer?
Yes! Air fryers are great for browning since they circulate hot air rapidly. Just brush your food with a thin layer of oil for even crispness.
Q3. What’s the best egg wash for pastries?
For that glossy bakery-style look, mix one egg yolk with a tablespoon of milk or cream. Brush lightly before baking.
Q4. Why do my cookies burn on the bottom but stay pale on top?
Your baking tray might be too dark or close to the oven base. Try using the middle rack and lighter pans.
Q5. Can I use sugar substitutes for browning?
Not always. Natural sugars like honey or brown sugar caramelize best. Artificial sweeteners don’t brown the same way.
In the end 🍽️
Getting that perfect golden-brown crust every time isn’t about luck — it’s about understanding a few simple details.
Dry surface, enough heat, a touch of fat, and a bit of patience — that’s really all it takes.
Once you nail these basics, every loaf, roast, and pastry you pull out of your oven will look (and taste) like it came from a bakery. And honestly, there’s nothing quite like that warm, golden glow waiting to be sliced into. ✨