
Home-baked bread sounds intimidating, doesn’t it? Now, what if I said you could bake scrumptious, crusty bread with just flour and water? No store-bought yeast needed. That’s the magic of sourdough. And it all begins with getting your hands on a starter.
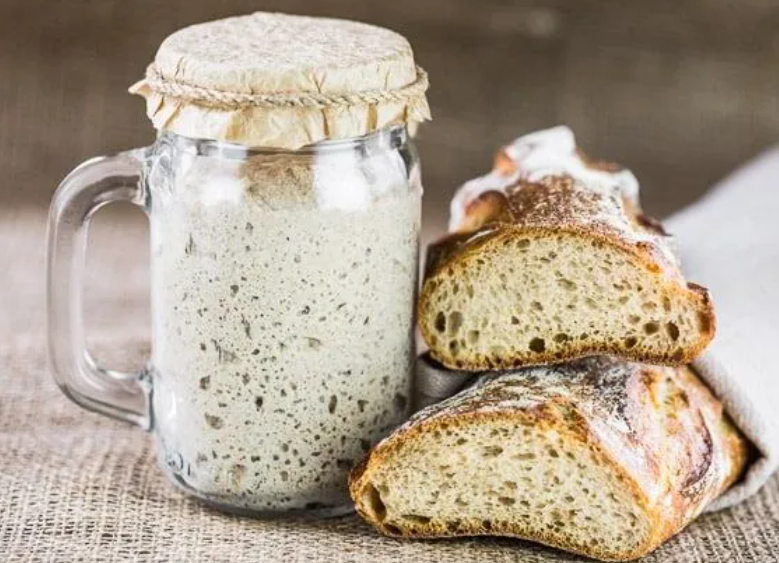
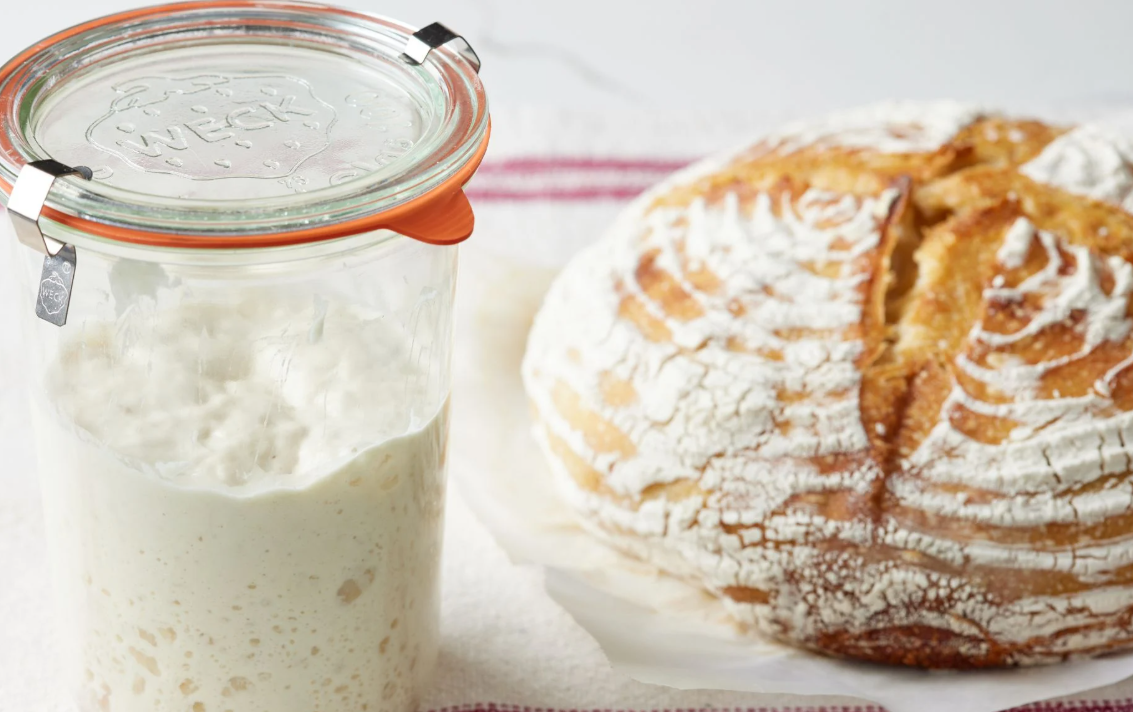
At its most basic level, a sourdough starter is a living blend of flour and water that harnesses the wild yeast and good bacteria in the air around you. Together, these little critters are coming together to make your bread rise and develop that distinct tangy flavor everyone loves. The best part? Once you’ve made your starter, you can keep it alive for years. Some bakers hand down their starters through generations, like family heirlooms.
This guide will take you step by step through the process of making and taking care of your very first sourdough starter. We’ll talk about what equipment you need, how to mix your starter, the signs of a happy, thriving starter and what can go wrong, along with some solutions. By the conclusion of this article, you will have all the information required to begin your sourdough journey with confidence.
What, Exactly, Is a Sourdough Starter?
Think of a sourdough starter as a micro-ecosystem existing in a jar on your kitchen counter. In that jar, wild yeast and helpful bacteria are perpetually consuming flour and creating carbon dioxide gas. This gas forms bubbles to help your bread dough rise.
The bacteria in your starter also produce acids that lend sourdough its characteristic sour flavor. Different starters take on different flavors, capturing yeast and bacteria in your area. That means starter made in San Francisco might taste slightly different from one made in New York or London.
Your starter requires regular feeding to remain alive and active. By feeding we mean adding fresh flour and water to provide those microorganisms with new food to eat. In exchange, they continue to multiply and produce the gases and acids of great bread.
Why Craft Your Own Instead of Buying One?
Now, you may be asking why anyone goes through the trouble of making a starter from scratch when you can buy dehydrated sourdough starter online. The most common reasons are why nearly all bakers default to the homemade path:
Making your own starter is part of the process to connect yourself with bread-making as people have understood it for thousands of years. There’s such a satisfying sense of life coming to your project over a couple of days. Homemade starters acquire idiosyncratic notes wherever you are, and they come to represent that place in the flavor of your bread.
You will also learn patience and the art of observation. You will get to know how to read your starter and you’ll understand what it wants. These skills translate into bread-making where comprehension of fermentation is key to great success.
What You Need to Get Started
The good news is that creating a sourdough starter doesn’t call for any costly equipment or elusive ingredients. Here’s what you’ll need:
Essential Supplies:
- 1 clean glass jar (at least 1 quart, with a wide mouth)
- All-purpose or whole wheat flour
- Water (preferably filtered or bottled)
- Kitchen scale (optional, but you should really own one)
- A rubber band
- A clean spoon or a spatula for mixing
Optional but Helpful:
- A loosely fitting lid or a breathable cloth covering
- Masking tape for marking levels
- A second jar for quick replacement during feeding
Choosing the Right Flour
The type of flour you use is more important than you thought. You can use any wheat flour, but different types will give you slightly different results.
Whole wheat flour or rye flour are fastest because they have more nutrients and natural yeasts. If you wish to push your starter along more quickly, start with whole wheat flour for the first few days before transitioning to all-purpose flour if that’s your pleasure.
All-purpose flour makes for a sweeter-tasting starter and yields lighter, more tender bread. A lot of bakers begin with whole wheat and then move to all-purpose once their starter becomes active.
Stay away from bleached flours or those with added chemicals, as they can impede the fermentation process. Organic flour is best for this since it has not been treated with things that might harm beneficial microorganisms.
Water Matters Too
Most places will have fine results with tap water, though if you know your water is super chlorinated, its chlorine might slow fermentation down. Chlorine is meant to kill bacteria, and it doesn’t know the difference between the harmful ones we don’t want in our starter and the beneficial ones that we do.
If you’re concerned about chlorine, try filtered water or bottled water, or let tap water sit out overnight to allow any chlorine to evaporate. You want the water to be room temperature, so not cold and not hot.
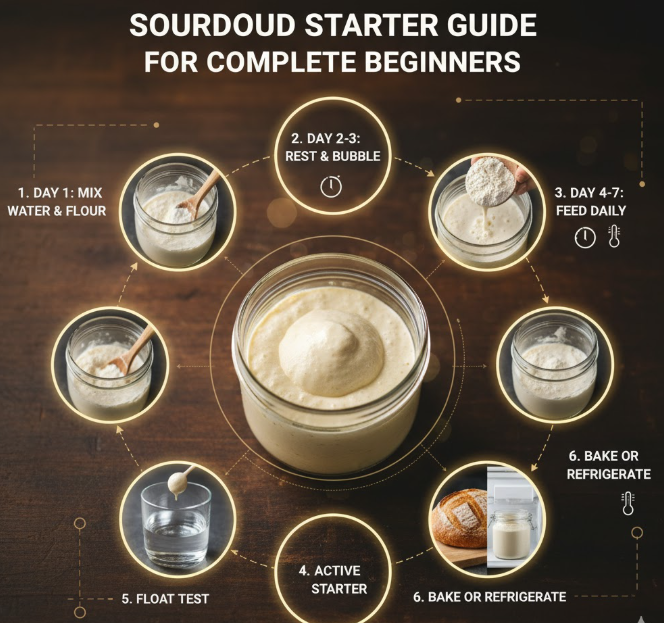
Starting Your Starter: Day by Day
Which brings us to the fun part of this process—actually creating your starter! This takes about 5-7 days but can be longer depending on how warm your kitchen is and the humidity in your area.
Day 1: The Beginning
Begin with 50 grams of flour (about 1/3 cup) and 50 grams of water (a little scant 1/4 cup) in your clean jar. If you aren’t weighing, start with equal volumes of flour and water.
Mix until there is no more dry flour left. It will be a bit thicker than pancake batter. Put a rubber band around the jar at the level of the mixture so you can monitor how much it’s growing.
Place a lid or cloth loosely on the jar. You want air to flow but you don’t want anything dropping into your starter. Just let it sit at room temp in somewhere around 70-75°F, if you can.
Do not expect a lot of action on Day 1. Your starter is just getting started.
Day 2: First Signs of Life
By Day 2, you may notice a few small bubbles forming. This is exciting! It means fermentation is beginning. But these early bubbles could be formed by other bacteria that will soon die off as the right microorganisms become dominant.
Today you’re going to make your first feeding. Discard half the starter (yes, I mean this: toss it or use for some other recipe). This is important because it clears the way for beneficial bacteria and keeps the ratio of good bugs to food favorable.
Stir 50 grams of flour and 50 grams of water into the remaining starter. Mix well, place the rubber band where it’s at & cover. The starter may smell a tad funky right now — that is okay.
Day 3-4: Smells and Changes
Beginners may get confused on days 3 and 4. Your starter may smell odd, in various ways: of acetone, cheese or sweaty socks. That mixture could even separate, with liquid floating to the top. Don’t panic! This is completely normal.
What’s going on is a tug of war between microorganisms. The “wrong” bacteria could temporarily flourish before the right ones settle in. This could explain why your starter seems really active one day, and slow the next.
Continue feeding it once a day, using the same method: Discard half, and stir in 50 grams of flour and 50 grams of water. Be consistent, even if it is not working.
Day 5-7: True Activity Begins
By Day 5 or 6, you should be seeing steady action. Your starter should double in size within 4-8 hours of feeding. There should be lots of bubbles throughout, not just on top. The odor will go from stinky to pleasantly sour and a bit sweet.
Continue daily feedings. You’ll know your starter is ready to use if it doubles consistently in 4 to 8 hours after feeding, bubbles appear throughout or the top is domed, and there’s a good sour-yeasty smell.
How to Know When Your Starter Is Ready
Knowing when your starter is ready to bake with is everything. Here is how to tell if a starter is ready to use:
| Sign | What to Look for from a mature starter |
|---|---|
| Doubling Time | Doubles in 4-8 hours after feeding |
| Bubble Structure | Bubbles throughout, not just on the surface |
| Smell | Pleasant, tangy and slightly alcoholic |
| Float Test | A spoonful will float in water |
| Consistency | Thick, stretchy and holds peaks |
The Float Test Explained
The float test is an easy method of determining if your starter is active enough to get down to baking. Put a spoonful of your starter into a glass of water. If it floats, it has all the gas it can stand! If it sinks right away, you need to give it more time or feed it again.
Perform this test 4 to 6 hours after feeding your starter when it is at its peak activity. That’s when it has the most gas bubbles and rising power.
Daily Care and Feeding Schedule
After you have your starter established, you must keep it up. The frequency that you feed depends on where you store it.
Room Temperature Maintenance
If you store your starter on the counter at room temperature, feed it once or twice a day. Warm, active starters are very hungry and need to be fed frequently.
Morning feeding schedule:
- Discard all but 50 grams of the starter
- Add 50 grams flour
- Add 50 grams water
- Stir well and let sit until ready to use again
This is the standard feeding ratio of 1:1:1 (starter:flour:water). Some bakers will use different proportions, but for beginners, this works well.
Refrigerator Storage (The Easy Method)
Home bakers tend to refrigerate their starter when they’re not actively baking. Fermentation slows way down in cold temperatures, and you will only need to feed once a week at the most.
To transition to refrigerator storage:
- Feed your starter as normal
- Let it rest at room temperature for 30 to 60 minutes
- Put it in the fridge, covered loosely with a lid
Remove it from the fridge, feed it, let it ferment for an hour at room temperature and put it back in. If you plan to bake, take your starter out of the refrigerator the night before and feed it 2-3 times to revive.
Common Problems and Simple Solutions
Every baker encounters starter problems. Here’s how to troubleshoot the most common problems:
My Starter Isn’t Rising
If your starter does not appear to rise, it could be due to a variety of reasons:
Temperature issues: If your kitchen is cold (below 65°F), fermentation slows way down. Transfer your starter to a warmer location, on top of the refrigerator or next to a warm appliance. You can also leave it in your oven with just the light on to keep warm.
Water quality: If you think chlorine may be the culprit, use filtered or bottled water instead. Some tap water sources have been treated with chemicals that can be destructive to yeast.
Old flour: Flour that has been sitting around your pantry for a long time may have less active yeasts and nutrients. Try fresh flour from a new bag.
Strange Liquid on Top
If a dark liquid begins forming on top of your starter, fear not: This is “hooch.” It’s alcohol the yeast have made when they run out of food to eat. It’s a sign your starter is hungry.
You can mix the hooch back in, or pour it off — either works. Then feed your starter immediately. If hooch is appearing more often, feed the starter more or at a higher ratio (more fresh flour).
Mold Growth
One serious problem will be more urgent than the others to correct: mold. If there’s fuzzy growth that appears pink, orange, green or black, your starter is contaminated. That one, alas, you have to toss and start again.
Mold typically develops due to contamination — from using dirty utensils or touching the starter with unwashed hands, or from allowing foreign objects to fall into the jar. Always use clean tools and wash your hands before handling the starter.
Too Sour or Not Sour Enough
Sourness varies according to fermentation time and temperature. The longer the fermentation and the cooler it is, the greater the lactic acid (a mild sort of sourness, like what you taste in yogurt). The shorter the fermentation and the warmer the temperature, the more acetic acid (sharp, vinegar-like sourness) is produced.
If your starter boasts a particularly sour flavor, you can try feeding it more often and using the very young, active starter. If you prefer a sourer one, ferment longer and maintain it slightly cooler.
First Use of Your Starter
When your starter continues to double and pass the float test, it’s time for baking! Here’s how to prepare it:
The night before you’re ready to bake, feed your starter with enough flour and water that if you remove some in the morning for your recipe, you’ll still have a little left over. The majority of bread recipes require 50-100g of starter.
You want to wait until your starter is at its peak activity—typically 4-8 hours after feeding. It will be bubbly and domed on top and smell pleasantly tangy. At this point it is going to have the greatest leavening power.
Measure out how much you need for your recipe, and pour the remainder back in the jar to feed or refrigerate.
Discard Uses
There will be a lot of discard in the feeding process. Don’t toss it—use it in other recipes! Sourdough discard adds flavor to:
- Pancakes and waffles
- Crackers
- Pizza dough
- Biscuits
- Muffins
- Flatbreads
These recipes are nowhere near dependent on the leavening activity of a starter, so feel free to use discard that’s not at full strength. There are lots of websites with large collections of recipes using sourdough discard.
Long-Term Storage and Vacation Planning
What if you want to go on vacation or take a break from baking? Your starter will live on without you.
Short Breaks (1-2 Weeks)
For times when you’ll be away for just a short period, feed your starter well and refrigerate it. It will settle in and take a chilly nap waiting for your return. When you return, remove it, discard most of it, feed it and give it a feeding or two to wake back up.
Extended Breaks (Months)
For longer breaks, dry your starter. Thinly spread some newly fed starter on parchment paper and let it air dry completely. When dry, break it into flakes and pack it in airtight containers.
To revive dried starter, combine the flakes with an equal amount of flour and water. Let the mixture sit, undisturbed for 24 hours and return to your normal feeding routine. It usually recovers in 3-5 days.
Freezing Your Starter
Some bakers freeze small amounts of active starter as insurance in case something goes wrong. Although some of the microorganisms are killed during freezing, survivors are numerous enough to restore the culture. Freeze equal parts starter, flour and water in ice-cube trays; repack cubes into a freezer bag.
To reactivate, thaw a cube and mix with flour and water then return to feeding schedule.
Advanced Tips for Better Starters
Once you have the basics down, these nuances will elevate your starter:
Modify hydration: The majority of new bread bakers start with 100% hydration (equal weight flour and water). Experiment with 80% hydration, for a stiffer starter that makes sweeter bread, or 125%, for a looser one that tastes more tangy.
Play with flours: Combine multiple flours to add complexity and depth of flavor. Try 80% all-purpose and 20% whole wheat, or mix in a bit of rye flour for more tang.
Control your temperature precisely: If you’re really particular about consistency, employ a temperature-controlled proofing box or seedling heat mat to maintain precise temperatures. This produces incredibly consistent results.
Take good notes: Track your feedings carefully. Note ratios, times, temperature and how actively bubbly your starter has become. You will, over time, learn the schedule and preference of your starter.
Frequently Asked Questions
How can I tell if my starter is bad?
A healthy starter will smell pleasantly sour, like yogurt or fermented fruit. If it smells like rotting garbage or if you see any fuzzy mold (not just liquid), then it is bad and needs to be tossed. But a lot of funky smells during the first week are normal as the culture finds its footing.
Can I use gluten-free flour to make a starter?
Yes! Gluten-free starters work but in a different way. Use rice flour, sorghum flour or a gluten-free flour blend. The procedure is the same, though rising patterns might vary. Gluten-free starters don’t stretch and rise so dramatically, yet can still raise bread well.
Why does my starter smell like paint remover?
This acetone aroma is an indication that your starter is really hungry and producing a lot of alcohol. Feed it more often, or use a higher ratio of freshly milled flour to starter. The smell will dissipate with regular feeding.
How long can a sourdough starter survive?
With care your starter can live forever. Some bakeries have starters that are more than a century old! The organisms just keep multiplying, so it’s a fountain of youth for bread-making cultures.
Should I Be Feeding My Starter If I’m Not Baking With It?
If you store it in the refrigerator, you only need to feed it once a week to keep it alive. For countertop storage, feeding must be performed daily. If you are not going to bake for months and prefer not to feed the starter, dry it or offer it to a friend who bakes more frequently.
Can I give my starter away to friends?
Absolutely! Sharing starter is a great baker’s tradition. As long as your starter is active and healthy, give friends 50-100g of fed starter with some written feeding instructions. There are countless lifelong friendships that have begun with a jar of sourdough starter.
What if I killed my starter?
If you neglected to feed it for weeks or left it in very cold or hot temperatures, try reviving it first. Discard everything except a tablespoon, add flour and water then feed it twice daily for 2-3 days. Starters are incredibly hardy and will often recover from being forgotten.
Your Sourdough Journey Starts Now
It might look daunting, but making a sourdough starter from scratch is a surprisingly easy undertaking if you allow plenty of time for fermentation. In a week, you’ll have a living culture for making delicious bread that can be kept going indefinitely.
Keep this in mind: Every starter is different. Yours will have its own personality, depending on your local environment, the flour you use and how you take care of it. There is no one “right” way to maintain a starter — it’s all about finding a routine that suits your schedule and lifestyle.
The best advice for someone new is straightforward: Stick with it, and don’t get discouraged in the first week when things may be strange or your results don’t make sense. The funky smells, the rising and deflating, the phases of what seems like inactivity — these are all normal occurrences when you’re getting a starter established.
The moment your starter is active and you bake your first loaf of sourdough bread, you’ll see why so many people get obsessed with this centuries-old technique. It’s one of those tasks that feels right deep in your bones — making bread out of flour, water, salt and time. The complexity of flavor, the crusty crust, the chewy interior — it’s all thanks to those tiny organisms living in that jar on your counter.
Start your sourdough journey today. Mix that initial batch of flour and water, mark it with a rubber band and let the magic happen. A week from now, you’ll have a well-fed starter and the skills you need to care for it for all the years to come. Welcome to the wonderful world of sourdough baking!


Pin77login? Been there, done that! Smooth login process, gotta say. Makes getting into the game quick and easy. Definitely a plus in my book. Check it out: pin77login