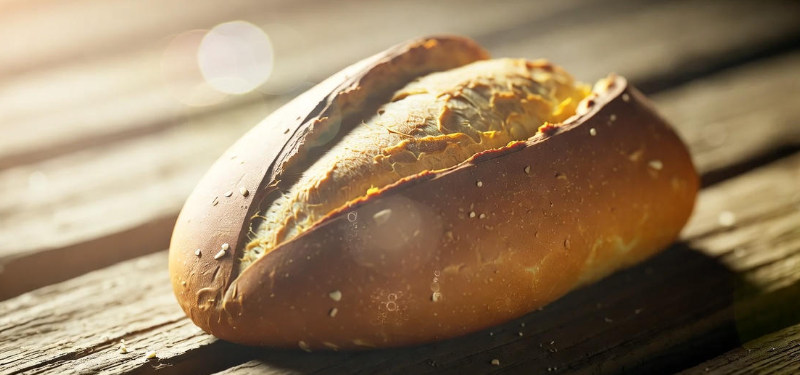
There is something magical about pulling a perfectly shaped, golden loaf of bread from your oven. The fragrance pours out of your kitchen, and that lovely dome or spiral pattern makes you feel like a pro baker. But here’s the reality: lots of home bakers have a hard time, too. Their dough becomes platter-flat, sprouts strange lumps or bakes lopsided. The good news? Shaping bread is not as mysterious as it seems. With the right techniques — and some practice to hone your spidey senses — you can produce bakery-quality loaves in your own kitchen.
Form matters a lot more than most people think. It’s not just appearance, though a good-looking loaf does impress. Well shaped loaves provide something to rise against, give a source of resistance from the outside for crust development and produce a place to get that airy, open yet not overly large hole crumb structure. When you shape dough properly, you’re creating surface tension that will hold everything in place in the oven. Without it, the greatest dough will become a disappointingly flat one.
This guide is everything you ever wanted to know about shaping bread loaves. Whether it’s loaves of sandwich bread, artisan boules or fancy braided challah, you’ll discover the tricks of the trade from professional bakers who do this every single day. We will go over the basics and consider different shaping approaches, trouble shoot common pitfalls and give you an insider’s tip that makes all the difference. You won’t need to be hyperattentive — by the end, you’ll step away with rough formulas and look forward to shaping any type of bread loaf beautifully.
Preparing Your Dough to Be Shaped
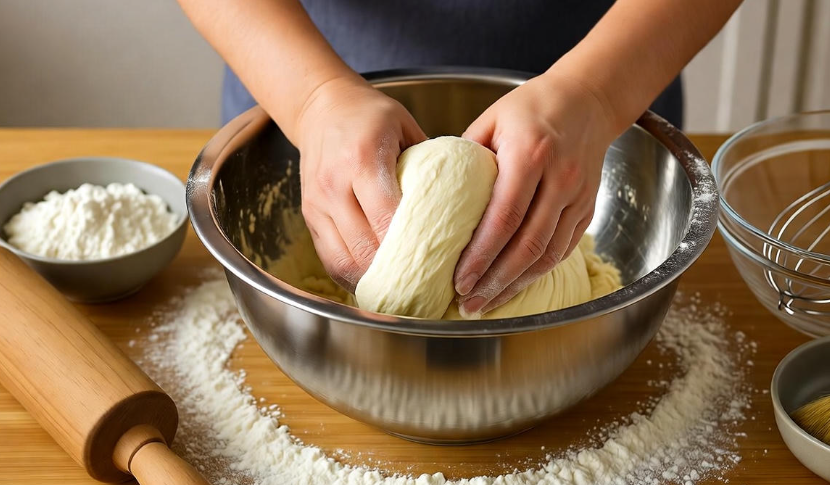
Your dough has to be in shape before you can think about shaping. Consider it akin to sculpting with clay — you can’t make something beautiful if the material isn’t pliable. Bread dough is the same way.
First, ensure that your dough is done with its first rise (referred to as bulk fermentation). The dough should look roughly doubled in bulk and puffy when you poke at it. Poke it with your finger, lightly. If it very slowly springs back to half its depth, you can start shaping. If it doesn’t bounce back immediately, wait a bit longer. If it doesn’t spring back at all, you might have over-proofed it.
Temperature matters a lot here. Cold dough is stiff and resists being shaped. So long as your dough is at room temperature (about 75-78°F) – this will be what makes the process easier and prevent it from not holding its shape. If your dough was in the fridge, set it on the counter to warm up for 20-30 minutes before shaping.
The surface you work on also makes a difference. Most of us like to work on a plain wood or plastic surface without flour, because a little stickiness helps with shaping. It gives you traction. If your dough’s outrageously sticky, just a whisper-like dusting of flour will do—but go easy. If there’s too much flour, the dough will be dry and hard.
Pre-shaping: The Secret Step
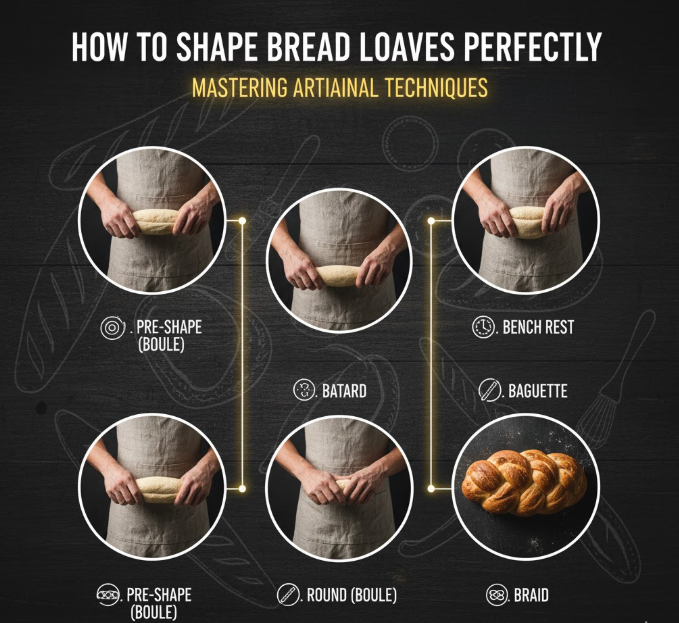
Here’s something a lot of novices overlook: pre-shaping. This will establish form and make final shaping far easier. Once the dough has risen once, carefully turn it out onto your work surface. If you’re making more than one loaf, divide the dough into pieces using a bench scraper or knife.
For each piece, loosely pull up the edges and tuck them into the center to form a loose ball. Turn it over so that the smooth side is facing up, and the seam sides down. Let these rounds sit for 15 to 30 minutes, covered with a moist cloth or plastic wrap. This rest period (referred to as bench rest) relaxes the gluten so final shaping is a breeze.
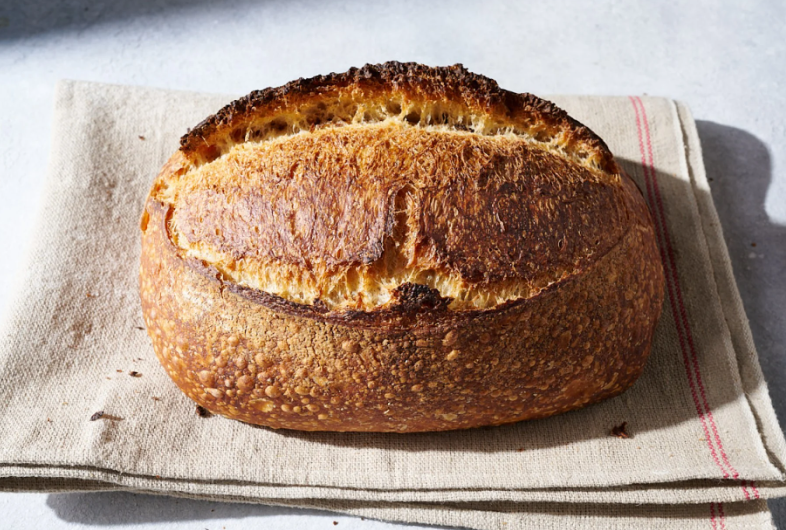
Forming a Classic Round Loaf (Boule)
The boule is likely the most traditional of all artisan bread shapes. It’s that lovely round loaf you see in fancy bakeries, suitable for soups or to bake into awesome table bread.
Begin with your pre-shaped, rested dough. Flip it over, seam side up. Gently stretch dough into rough circle — do not punch it down or press out all its gas. Those bubbles are the ones that make your bread rise light and airy.
Now comes the folding technique. Fold over the farthest edge from you toward the center. Fold right edge to the center. Then down the left side and finally across the bottom. You are basically folding the corners of a square envelope. Then press gently but firmly along each fold to seal.
Now flip the whole thing over, so all of those seams are on the bottom. Clap your hands around the sides of the dough. With light circular movements pinch the dough, in order to twist it around. You are creating surface tension — tightening that outer “skin” of the dough. The dough will be a little taut and the surface smooth. Do this for 15-20 seconds.
The trick is striking a balance. Too slack and your bread will flatten out. Too tight and you have it too hard, tearing the surface, making weak spots. You want it to feel like a not overly under-inflated balloon — firm but with some give.
Set your shaped boule seam side up in a floured banneton (proofing basket) or seam side down on a parchment lined cookie sheet. Cover and let it sit until proofed (poke test).
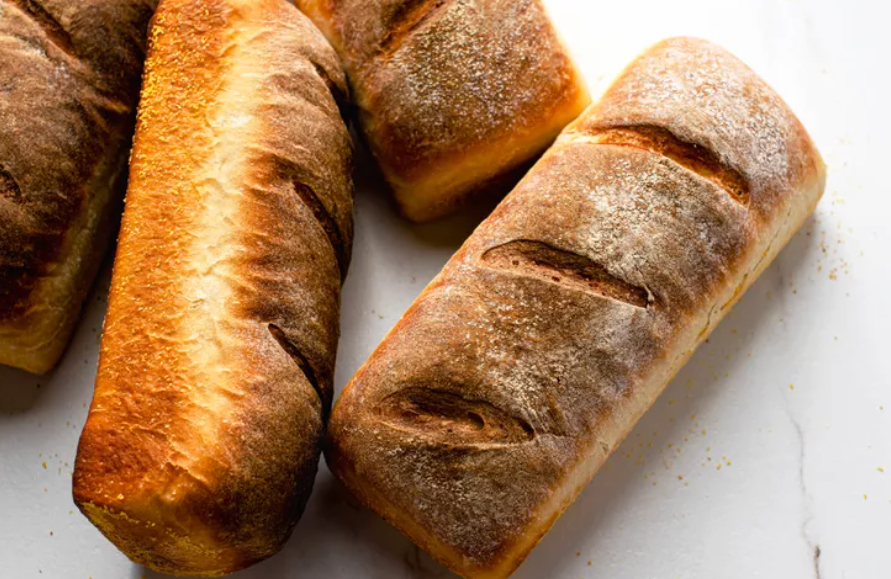
Making the Ideal Pan Loaf for Sandwiches
Pan loaves are what most people consider to be “regular” bread — the type you slice for sandwiches and toast. Shaping them correctly has resulted in an even, rectangular shape that not only looks beautiful when you slice into it.
After your bench rest, place your dough on the counter and use your hands to flatten it slightly into a rough rectangle. The longer side should be the width of your loaf pan. The larger ones near the surface can be pressed away without destroying all of them.
Working from the short side farthest from you, fold the top third of the dough down over the center. Use your fingers to press the seam closed. Now fold the bottom third up and over, as if folding a letter. Press to seal again.
Turn the dough 90 degrees so that the seam is running horizontally in front of you. Now roll it up tightly as if you were rolling up a sleeping bag or yoga mat. Roll forward from the top, and use your thumbs to maintain tension as you go. Seal on the seam with each roll. You want enough to make a good, dry structure but not so much that you squeeze out all the air.
When you get to the end, pinch the last seam shut. Put the loaves in a greased loaf pan, seam side down. The ends should reach the short sides of the pan, and it should fill about two-thirds of the height of the pan. Too small and it won’t fit the corners. It should be large enough to leave room for the batter to expand, but too big and it will overflow in the oven.
Getting Those Sharp Corners
Like professional-looking sharp corners on your sandwich bread? Here’s the secret: after you put your dough in the pan, lightly press it into the corners with your fingers. Don’t force, just nudge it where you want. It will rise and fill those corners in its proof.
Mastering the Batard Shape
A batard is an oblong or torpedo-shaped loaf — longer than a boule but not as long as a baguette. It’s a great option for small to medium sized families and it looks very professional.
Begin with your preshaped round post bench rest. Flip it seam-side up and gently pat into a rough oval. Fold down the top third, toward the center and press to seal. Fold up the bottom third, and press to seal. Now you have an approximate cylinder.
Roll the dough so that it is seam side down, and the seam is running horizontally. Roll the cylinder back and forth with the heel of your hands, applying a little pressure. Begin with your hands in the middle, and slowly make your way toward the ends as you roll. This stretches the dough and maintains tension on the outside.
The aim is a 10-12 inch-long, oval loaf with slightly tapered ends. The tension should be the same all over — not too tight at the ends, or too loose in the middle. Seam-side up, place it in a floured banneton or an oval proofing basket.
Braiding & Beautiful Challah or Festive Breads
Braided loaves appear more complicated than they are, so long as you can keep track of the pattern. The most popular is the three-strand braid, although there are four- and six-strand varieties for fancier events.
After your dough comes up for the first time, it gets divided into three equal parts (a scale is your friend here). Roll each piece into a rope 16 to 18 inches long. The secret to excellent rope-making is even pressure. Begin in the middle of the piece of dough and roll from the center outward, using both hands and gentle, even pressure.
Bunch the three ropes together on one side. If you’re going for something neater, tuck that pinched end under. Now comes the braiding:
- Cross the right strand over the middle strand (right strand becomes the middle)
- Take the left strand and cross it over the new middle strand
- Now do it again: right over middle, left over middle, right over middle…
The braid should be tight, not insanely tight. You want the strands to meet, but there should still be some space for the loaves to expand as they proof and bake. When the other end is reached, pinch the strands together and tuck under if desired.
Four-Strand Braiding Pattern
For a neat four-strand braid, line up four ropes next to each other and pinch together at one end. The pattern is: take the far-right strand and cross it over top of the two middle strands, setting it in between that second and third-from-the-left strands. Cross the far left strand over to be the far right strand. Repeat this pattern. It’s a beautiful, detailed style.
Making Baguettes Like a French Baker
Baguettes are iconic but intimidating. That long extruded shape with the perfect scoring looks impossible to pull off in my home kitchen. But if you have the right technique, you can come pretty close.
Press your dough into a rectangle that is about 6 inches wide after pre-shaping the dough into a rough rectangle and allowing it to rest. Fold the top third down and seal with your fingertips. Fold bottom third up and seal.
Now comes the rolling. Rotate the seam so that it is horizontal to you. Roll the dough away from you, using the heels of your hands, with light, even pressure. Rock the dough a little to seal the seams after every roll. Roll and seal more of the way, until you have a cylinder 12-15 inches long.
Here’s the professional trick: you want to end up with more pressure toward the center and less at the ends when you roll. This prevents the strange chunky ends that lots of homemade baguettes end up with. The baguette should taper slightly at its tips and be of uniform width, end to end.
Put the shaped baguettes, seam-side up in a floured couche (heavy linen cloth) or folded layers of kitchen towel. The sides are supported by the fabric and help to retain their shape during proof.
🧂 Before your next recipe, go through The Ultimate Guide to Baking Ingredients to know what each item really does.
Creating Tension: The Most Valuable Asset
Whether you shape it this way or that, the secret ingredient is actually surface tension. That is the tension in the outer layer of dough — stretching a bedsheet taut over a mattress.
There are a number of good things about a vigorous surface tension:
- Supports your loaf up instead of flattening out
- Forms that attractive “oven spring” where bread blooms in the oven
- Yields an even and attractive crumb structure
- Easier and more effective scoring (cutting of the surface)
You build tension through technique. When folding or rolling the dough, you’re practically pulling it together on the outside while letting the inside be soft and air-filled. The trick is finding the sweet spot: enough tension to maintain the structure, but not so much that you rip through the dough (or squeeze out all of your precious air).
Watch your dough as you work. You should see no visible tears, although the dough should look glossy. If tears or holes appear in the surface, you have gone too far. If it still looks saggy or loose, keep going.
The Pull-and-Tuck Method
For round loaves, here’s how to do it: Position both hands, one on each side of the dough. Pull the bottom down and under, rotating the dough a bit between each pull. Repeat 4-6 times around the circle. It’s similar to tucking in a shirt — you want to gather and pull extra fabric (here: dough) under, in order to have the outside surface be smooth.
Common Shaping Mistakes and How to Fix Them
Even seasoned bakers have problems. Here’s what I learned while troubleshooting the most typical issues:
Problem: Dough Keeps Springing Back
That means the gluten is too tight. Solution: Your dough may need a longer bench rest. The gluten requires time to relax. If it’s middle of the way through and you’re fighting with it, take a break, cover with wrap and leave for 10 minutes.
Problem: Dough is Too Sticky to Work With
A little stickiness is fine, but if the dough feels too sticky to form into a nice ball shape, it won’t hold up. Solutions: Then add small amounts of flour to your hands, but not the dough. Or lightly oil your hands. It’s possible that you have a recipe for very wet doughs (75% and above) which need to be treated more gently.
Problem: Loaf Bakes Flat
This is typically due to too little surface tension or an over-proof. Solutions: Practice controlling the buildup of tension. Be sure you’re not allowing the dough to proof too much after shaping. The poke test should leave an indentation that slowly springs back, not one that remains completely deflated.
Problem: Odd Shaped or Crooked Loaf
This can occur when the dough isn’t evenly tensed. Solutions: Be more conscious in distributing the force when you are shaping. For batards and baguettes, be sure that your hands both move outward symmetrically from the center.
Problem: Dough Tears During Shaping
The dough could be too cold, too tight or over-handled. Solutions: Warm it just a bit; Handle it in a more tender manner; Or maybe you have just been working it too much and should let the dough rest.
Tools That Make Shaping Easier
You don’t need fancy equipment to shape bread well, though a couple of tools really aid:
Bench Scraper: You will swear by this flat piece of metal or plastic. Use it to portion dough, scrape your work surface clean and even assist in turning dough during shaping. Professional bakers use these constantly.
Scale: To portion your dough all out equally to have the same size on every loaf. This is particularly crucial for pan loaves and rolls.
Banneton (Proofing Basket): Made from reed or cane, these baskets will cradle your dough in its final rise and make for lovely rings on the crust. If you don’t have one, a bowl lined with a flour-dusted kitchen towel will work just fine.
Spray Bottle: If your dough is a little dry and won’t stick for tension building, give your working counter a quick spritz of water.
Couche or Heavy Linen: These cloths support the sides of baguettes and elongated loaves during proofing.
Comparing Different Shaping Techniques
| Shaping Method | Difficulty | Ideal For | Key Advantage | Common Pitfall |
|---|---|---|---|---|
| Round Boule | Easy | Artisan breads, sourdough | Forgiving shape and impressive look | Not building enough tension |
| Pan Loaf | Moderate | Sandwich bread, toast | Even shape with easy slicing | Not filling in the corners properly |
| Batard | Moderate | Table breads, gifts | Professional look and good crust | Uneven tension |
| Baguette | Hard | French bread, crusty loaves | Maximum crust area | Thick ends or clumsy shaping |
| Braided | Moderate | Holiday breads, sweetened dough | Beautiful presentation | Braiding too loose or tight |
Timing Your Shapes
You can say that timing is everything in bread baking, but shaping has its window, too. You shape your dough too early and it tears. Shape too far after the bulk ferment and it’s overproofed, likely breaking apart.
The ideal time to shape is when your dough has finished bulk fermentation (first rise), and rested 15-30 minutes after pre-shaping. By now, the gluten has relaxed enough to stretch without breaking but is still stiff enough to hold tension.
After you’ve formed it, your bread is in final proof. That normally takes 45 minutes to 2 hours at room temperature, but it all depends a bit on your recipe and the temperature of the room. You want the dough to puff up and almost double in size.
Give it the poke test: Gently press your finger into the dough about half an inch. If it springs back slowly and leaves only a slight indentation, it is ready to bake. It needs more time if it springs back quickly. If it springs back minimally, you’ve proofed a bit too long.
Working with Different Hydration Levels
Hydration simply means the amount of water you add to the flour in your dough. It makes a huge difference in the way you form.
Low Hydration (60-65%): These are firmer, more manageable doughs. They hold their shape nicely and are ideal for beginners. Think bagels and sandwich breads. Shaping is straightforward—the dough cooperates.
Medium Hydration (65-75%): Most breads occupy this range. The dough is soft but easy to work with. You can achieve your standard shaping behavior here as well. This encompasses most white, whole wheat and simple sourdough loaves.
High Hydration (75-85%+): These are the sticky, wet doughs that are more challenging. They yield beautiful, open, airy crumbs yet need to be handled differently. Fold them instead of doing the regular shaping. Treat gently, flour less, and fold more in bulk to help build the structure. Be swift and bold, however, when shaping.
For high hydration doughs, try utilizing the ‘stretch and fold’ process during bulk fermentation. Stretch one side of the dough up and fold it over the center every 30 minutes. Turn the bowl and repeat on all 4 sides. This adds some structure, without any kneading at all.
For more detailed guidance on working with different dough types, check out King Arthur Baking’s comprehensive bread baking guide.
Scoring: The Final Touch
After shaping and proofing, most loaves require scoring — slashing the top with a sharp blade. This isn’t just decorative. The scoring directs the oven bloom of the loaf so you won’t end up with random splits.
Use a very sharp knife, razor blade or professional lame (pronounced “lahm”). Hold it at a 30-45 degree angle to the surface of dough, not straight up and down. Cut quickly and confidently, about 1/4 to 1/2 inch deep.
For round boules draw a simple cross pattern or square pattern. For batards, a slash or two along the length is lovely. For pan loaves, one long slash down the middle creates an attractive split top.
It is more difficult to score wet dough than drier dough. If the blade drags or sticks, it’s not sharp enough. To make it easier, some bakers lightly dust the top and side of the shaped dough with flour or mist it with water just before scoring.
Practice Makes Perfect: Developing Your Abilities
As with any skill, the more you do it, the better you get. Your initial batches may not achieve perfect form, and that’s okay. Even If You’re a Professional Baker, You Had to Start Somewhere.
Here is a good practice: Make a basic white bread recipe every week. Work through one shaping technique at a time until it’s second nature, then move to the next. Take notes on what you tried.
Mind your dough, not just the clock. Bread is a living thing, and circumstances shift. What took 1 hour last week might take 90 minutes this week, when your kitchen is a little cooler. What it will help you do, though, is learn to read the dough — judge by feel and look as well as when you hold it between your hands.
Film yourself shaping (yes, really). Sometimes you notice things about your own technique that you don’t see when it’s happening. Do you rush? Press too hard? Not build enough tension? Video doesn’t lie.
Participate in a baking community. Many are online, some also meet in person. Observing how others think and asking questions will help you learn more quickly. Instagram and YouTube both have an army of bakers showcasing their lifetimes’ worth of craft.
Frequently Asked Questions
How tightly should I roll my dough?
Your dough also wants to be taut but not strained — it should feel like a firm handshake, not a death grip. You need enough tension to hold the structure together, but not so much that you tear the surface or squeeze all of the air bubbles out. If the surface appears shiny and is smooth with no tears, it’s most likely right.
Can I reshape dough if it goes wrong?
It’s best to let it rest and try that again than pushing it. If you have torn the surface, or the shape is unsuccessful, cover and leave to rest for 10–15 minutes. The gluten will rest and become easier to rework. It’s okay to reshape once, but multiple shaping will compromise the gluten structure and your final texture.
Why do my shaped doughs flatten, instead of remaining round?
It’s typically the result of insufficient surface tension or an over-proofed dough. Make sure you build up enough tension during shaping with those circular cupping motions for boules or tight rolling for other shapes. Also, make sure you’re not proofing the dough too long after shaping — it should be puffy but not completely deflated by the time it goes into the oven.
Do I need a banneton basket to shape round loaves?
No, but they do help. A banneton provides essential support during the final proof — and creates those pretty spiral patterns. If you don’t have one, a bowl lined with a clean kitchen towel heavily floured will do just fine. The towel functions to hold the shape and provide support and texture. Use adequate flour to keep things from sticking.
How can I tell when shaping if I’ve overdone it?
Over-worked dough will look too tight and feel too tight. You may notice a few tears on the surface, or it might feel rock-hard instead of slightly yielding. When you bake, improperly shaped loaves will blow out anywhere that they want to because they are under too much internal pressure. And if it looks over-worked, just let it rest for a minute or two — as the dough sits there, it may relax enough to come back from the brink.
Do I need to flour my hands when shaping?
Use flour very sparingly. A little stickiness between your hands and the dough is actually good for you, as it builds tension. If you flour too generously, the dough simply slides around and does not tighten. Experiment with what happens if you work with your hands just barely moist, or very lightly floured. Add flour only if the dough is unworkably sticky.
How long is bench rest?
Usually 15-30 minutes, covered under a damp towel or plastic sheet. How long will depend on how developed your dough is gluten-wise and the temperature of the room. 15 minutes might suffice in a warm kitchen. In a chilly kitchen you may need 30. The dough should be relaxed and pliable — if it still springs back aggressively when you attempt to shape it, let it go a while longer.
Can I shape dough right out of the refrigerator?
It’s possible but not ideal. Cold dough is rigid and resists you, which makes it harder to build the required tension. If you are doing a cold fermentation (retarding dough overnight in the fridge), allow it to reach room temperature for 20-30 minutes before shaping. It is going to be far more cooperative and you are going to see better results from that.
You’re On Your Way to Perfect Loaves
Bread shaping is one of those skills that you fret over until it just clicks. One day you’re struggling with dough that’s resistant — sticky, difficult to work and recalcitrant; the next day your hands just know how. That muscle memory develops with each successive loaf you bake.
And remember: Even crooked loaves taste good. An imperfect, slightly lopsided boule will still yield amazing toast. A pan loaf with one corner that failed to fully fill is still better than store-bought bread. Don’t let perfectionism get in the way of enjoying the process.
The techniques we’ve used here — building surface tension, folding properly, timing your shapes, working with dough at different hydration levels — these make up best practices in shaping a good-looking loaf of bread. Hone these basics and you will be skilled enough to approach any bread recipe with confidence.
Begin with easier shapes like round boules or pan loaves. Practice those until you become an expert before trying trickier shapes, such as baguettes or elaborate braids. There’s no rush. Bread baking is a lifelong endeavor, not a competition.
Take note of how your dough feels in your hands. That feedback you feel is a better teacher than any article or video ever could be. Every dough is a little different depending on flour, hydration, temperature and a dozen other factors. That inherent ability to read those subtle differences makes you a better baker.
And, above all, go easy on yourself. Professional bakers shape hundreds of loaves before they get the hang of it. Allow yourself that same learning curve. Enjoy your successes, learn from your flops, and continue baking. Before you know it, you’ll be pulling wonderfully shaped loaves from your oven and wondering what the fuss was all about.
So your kitchen is now a bakery. And, voilà, your hands are no longer just yours; they belong to the bread. Every loaf you shape is practice, every bake is an accomplishment. So take the dough, have faith in your technique and shape something beautiful. The perfect loaf is just a few folds and turns away.