
Few things compare to biting into a soft, chewy cookie after it just came out of the oven. That satisfying texture — crunchy around the edges and soft in the middle — is why homemade cookies are a classic treat all over the world. But while cookies can seem simple, many home bakers don’t quite nail it, resulting in hard or crunchy, or worse, cake-like instead of chewy.
The key to making soft and chewy cookies isn’t just to follow a recipe — it’s to understand the science behind the baking, which can help you make any recipe that yields melted butter and almost-crispy edges exactly how you want it. No matter what type of cookie you’re baking, whether it’s chocolate chip cookies, oatmeal cookies or sugar cookies, the process is always the same. Tiny tweaks to your ingredients, mixing method or baking time can make all the difference between disappointing and delicious cookies.
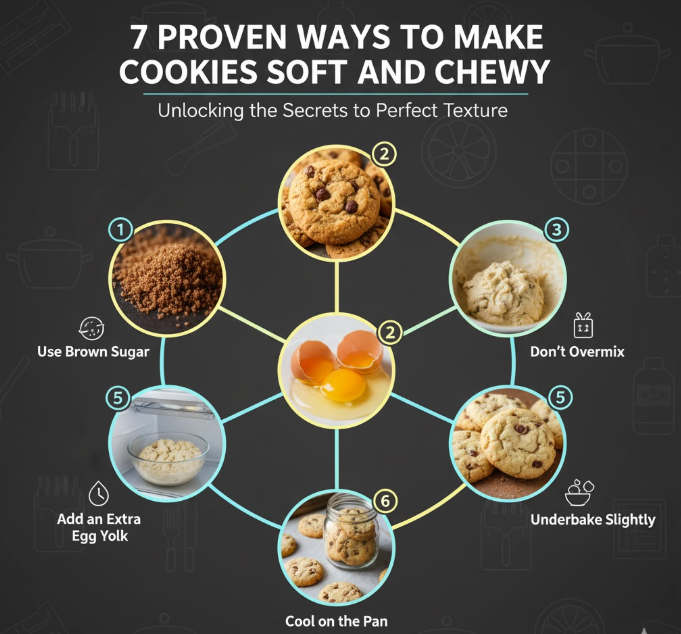
In the complete how to, we’re going to make 7 helpful tips for baking soft & chewy cookies every time. Both of these methods have been passed down through generations of professional bakers and home cooks, though no matter your level of expertise in the baking sphere, they’re both effective. From the best type of sugar to use to nailing the perfect temperature in your oven, you’ll find all the knowledge you need to make cookies that remain soft for days. So, here we are with these GAME-CHANGER tips that will take your cookie-baking skills to an entirely new level.
1. Opt for Brown Sugar Instead of White Sugar
The kind of sugar you use makes a huge difference in the texture of your cookie. When you’re aiming for soft and chewy cookies, brown sugar is your best friend, and there’s good reason it does the trick.
It is the molasses in brown sugar, which is naturally hygroscopic (it attracts and holds moisture). This moisture was enough to keep the cookies soft, and not just out of the oven. White granulated sugar, on the other hand, makes for a crisper texture because it doesn’t retain moisture in quite the same way. Brown sugar melts while baking, forming that chewy denseness that stops cookies from drying out.
For the best flavor, combine both sugars, but make brown sugar the highlight. A ratio of 75 to 25 brown sugar versus white sugar is the way to go–enough chewiness from the brown sugar but not so much that your cookies lose their shape.
Tip: Because it contains more molasses than light brown sugar, dark brown sugar will give you extra-chewy cookies with a richer flavor. You could also mix a tablespoon of molasses with one cup of white sugar to make your own brown sugar.
Let’s look at how various sugar levels affect cookie texture:
| Sugar Ratio | Texture | Use for |
|---|---|---|
| 100% Granulated White | Thin and crispy | Snickerdoodles, thin & crispy-type cookies |
| 50% White / 50% Brown | Golden and slightly chewy | Classic chocolate chip cookies |
| 75% Brown / 25% White | Very chewy | Blend to make my bakery-style soft cookies |
| 100% Packed Dark Brown | Denser, very moist | Molasses cookies, Gingerbread |
2. Add an Extra Egg Yolk
Eggs are the flexible, structural backbone of a cookie recipe, but not all components of an egg behave in the same manner. The egg white provides structure and helps cookies rise; the yolk, rich with fat and emulsifiers, gives these baked treats a tender, chewy texture.
By adding an extra egg yolk to your cookie dough (above and beyond what the recipe calls for), you’re essentially upping the fat without adding in any of its partner in crime, those pesky proteins that exist in whites but that can also make cookies cakey. This additional fat “coats” the flour particles, thus interfering with gluten formation, and yields a softer, less chewy cookie.
For most recipes that call for a whole egg, one whole egg and an extra yolk will do the best trick. This method works especially well in chocolate chip cookies, peanut butter cookies and sugar cookies. That extra yolk does double duty, giving cookies a richer color and stronger flavor.
Note: Don’t throw away those extra egg whites! You can keep them in an airtight container in the refrigerator for up to four days and add them to batches of meringue, royal icing, or scrambled eggs.
3. Try Melted Butter Instead of Softened Butter
The temperature and state of your butter makes a huge difference with cookie texture, and this is one of the most effective tricks in getting chewiness. Most traditional recipes recommend softened or room-temperature butter, but melted butter results in a denser, chewier cookie.
If softened butter is creamed together with sugar, it aerates the mixture in the dough. That air forms a lighter, cake-like interior as the cookies bake. Melted butter, of course doesn’t. Instead it gets mixed in more evenly into the sugars and turns the dough denser (heavier). All that density means a chewier end result.
Here’s how to do it the right way when making cookies:
- Fully melt your butter and let it sit for about 5 minutes (you don’t want it to be so hot that it cooks the eggs when you add them)
- Whisk your melted butter together with the sugars until fully combined
- The mixture should resemble gritty wet sand more than a fluffy cream—this is just as it should be
- Mix in your eggs and vanilla until just mixed
Pro baker’s secret: Brown your butter before you use it for an even more amazing outcome. Browning the butter develops nutty, caramelized flavors and still gets you that chewy bite. Be sure to let it cool completely before mixing with your dough.
4. Chill Your Dough Before Baking
It can be hard to wait when you are dying for fresh cookies, but this is one of the most important steps that lead to soft and chewy results. This method accomplishes several crucial things that enhance textural and flavor quality.
In the first place, letting cold solidify the fats in your dough. With cold dough, cookies begin to bake before the edges can spread as much. This builds a more dense and chewy cookie. Hot dough that expands quickly in the oven makes cookies crisp (and don’t have the desired soft center).
Secondly, chilling allows the flour to fully hydrate. When flour is dampened and left to sit for a long time, it actually absorbs more liquid, making the dough come together really well; there won’t be any dry spots. That hydration process also allows the gluten to relax, resulting in a more tender cookie.
Third, chilling develops flavor. While the dough is resting, all of the ingredients are given a chance to meld together and develop more complexity. Some professional bakers chill their dough for the best possible flavor, 24 to 72 hours.
Chilling guidelines:
- Minimum chilling time: 30 minutes
- Optimal chilling time: 2-4 hours
- Maximum chilling time: 72 hours
- Store in an airtight container for up to 3 months or freeze dough balls
But if you’re in a hurry, even half an hour in the freezer is better than none at all. Just be sure to wrap your dough tightly in plastic wrap so it doesn’t dry out or take on refrigerator smells.
5. Don’t Overbake—Pull Them Out Early
This is probably the number one mistake of home bakers. The number one reason for hard cookies is overbaking. Perfect cookies bake in the oven until they are just slightly underdone looking in their center.
Cookies keep cooking on the hot pan even after you take them out of the oven. And this carryover cooking can tack on another 2-3 minutes of baking time. If you bake these until they look fully done in the oven, you’ll have taken them too far by the time they cool.

Here’s what to look for:
Perfect timing indicators:
- Edges will need to be set and slightly golden brown
- Centers should still appear slightly puffy and underdone
- The top may seem slightly shiny or wet in the middle
- The centers should jiggle very slightly when the pan is gently shaken
Most cookie recipes bake for 10 to 12 minutes! For soft, chewy cookies lean toward the shorter end of that range, or even lower it by 1-2 minutes. For example, if your recipe says 12 minutes, try 10 instead.
Temperature matters: Always test your real oven temperature with an oven thermometer. Lots of ovens can be off by 25 degrees or more — a serious baking handicap. If your oven is on the hot side, reduce the temperature by 25 degrees and keep an eye on the cookies.
| Cookie Size | Baking time at 350°F | What you’re Looking for in Your Cookies |
|---|---|---|
| Small (1 tablespoon) | 8-10 minutes | Edges are barely golden |
| Medium (2 tablespoons) | 10-12 minutes | Edges are golden and the centers look puffy |
| Large (3+ tablespoons) | 12-14 minutes | Edges are set, but the centers will still be soft |
| Giant bakery-style | 14-16 minutes | Edges will begin to get crispy and centers very soft |
When done, take the cookies out of the oven and allow to cool on baking sheet for 5 minutes before transferring them to a cooling rack. This rest helps them firm up just enough to be picked up without breaking and remain soft within.
🔥 Don’t let oven confusion ruin your bake. Read Understanding Oven Temperatures for Better Baking to master temperature control.
6. Add Cornstarch to Your Flour
All of the above is true, but here’s one secret ingredient — it’s not a deal-breaker. The little bit of cornstarch you add to your flour helps interfere with the formation of gluten, making everything ridiculously tender and soft.
Cornstarch is a pure starch with no protein and when it comes to wheat flour, it has gluten-forming proteins. When you replace some of your flour with cornstarch, you are essentially reducing the protein percentage in your dough. Less protein inevitably means less gluten formation, and less gluten presents as more tender cookies.
How much to add: Substitute two tablespoons of cornstarch for every cup of all-purpose flour you’re using in the ingredients. For instance, if your recipe asks for 2 cups of flour, then instead use 1¾ cups flour plus ¼ cup cornstarch.
The distinction is minuscule but perceptible. Cookies with even a small amount of cornstarch have a really soft, nearly melt-away quality that you can’t get with flour alone. They also seem to be a touch thicker and puffier.
I use this for:
- Sugar cookies
- Snickerdoodles
- Shortbread cookies
- White chocolate macadamia nut cookies
- Any cookie that you’d like the texture to be ultra-tender
Alternative: Cake flour already has a lower protein content than all-purpose (about 8% as opposed to the 10-12% in all-purpose). You can use cake flour in place of all-purpose at a 1:1 ratio for softer cookies, but the cornstarch method allows more control.
7. Store Cookies Properly to Keep Them Soft
Soft cookies that are perfectly baked can still go hard and stale if you don’t store them right. The last step to help keep that fresh-from-the-oven texture for days is proper storage.
Soft cookies’ enemy is air exposure. If cookies are unwrapped, they will dry out and become hard. The answer is to create an airtight environment that contains moisture.
Best storage methods:
Option 1: Airtight Container and a Slice of Bread
Put your cooled cookies in an airtight container along with a slice or two of fresh white bread. The cookies soak up moisture from the bread and stay soft for a week. Change the slice of bread every 2-3 days. Your bread will harden and become stale, but your cookies will continue to be soft.
Option 2: Paper Towel-Lined Container
Line an airtight container with a paper towel, add cookies and place another paper towel on top before sealing. The paper towel absorbs excess moisture while the container guards against drying out.
Option 3: Wrapping Individually
For more long term storage, individually wrap each cookie in plastic wrap or plastic film, and then place them all together into a freezer bag. Frozen cookies keep for 3 months. Thaw at room temperature for 30 minutes, or microwave for 10-15 seconds and they’re warm like straight out of the oven.
Storage rules:
- Always cool cookies completely before storing (heat creates condensation and sogginess)
- Never combine different cookies in one container (flavors and textures migrate)
- Keep chewy cookies away from crispy ones
- Store containers in cool, dry place out of sunlight
- Refrigeration is not generally recommended because it tends to dry out cookies
Emergency refresh trick: If your cookies have indeed hardened, put them in a microwave-safe bowl along with a damp paper towel (not touching the cookies). Microwave for 10-15 seconds. The steam generated by the paper towel will soften the cookies immediately.
How These Methods Work Together
All of these seven techniques make a powerful difference on their own, but when you combine them, cookie greatness happens. This doesn’t mean that you must use all seven in every batch, but it does help to have an understanding of how they work together when you’re modifying recipes to your taste.
For maximum chewiness, try combining brown sugar, melted butter, an extra yolk, and chilled dough—this will give you incredibly chewy cookies. If you throw in some cornstarch, too, and pull them out of the oven just shy of done, you get professional-bakery style soft cookies to rival any pro bakery.
Look at these methods as the tools in your baking toolbox. Certain types of cookies benefit a little more from certain methods:
- For thick and bakery-style cookies: Keep dough cold, use melted butter, bake large cookies
- For super-soft cookies: Focus on brown sugar, extra yolk, cornstarch
- For chewy edges with soft centers: Try a sugar blend and perfect your baking time
Try mixing and matching to find your own personal ideal cookie. Take notes on what works best for your oven, climate and taste preferences.
Common Mistakes to Avoid
Even if you do follow these reliable approaches, some potential pitfalls can foil your plans to achieve a soft cookie:
Overmixing the dough: Once you add the flour, mix until just combined. Overmixing the dough creates gluten, which results in tough, cakey cookies. Stir by hand for the final phase if you can.
Using expired baking soda or baking powder: These leavening agents lose potency as they age. Should your cookies spread too much or not rise properly, your leaveners may be expired. Quickly test baking soda by adding a bit to vinegar — it should fizz right away.
Measuring flour incorrectly: Over-flouring produces hard, dry cookies. Spoon flour into measuring cups and level off. Never scoop directly from the bag, which compresses the flour and causes there to be 20-30% more than if measured by spooning. Learn more about proper flour measuring techniques for better baking results.
Baking on hot pans: The rule is to use cool or room-temperature baking sheets. Dough added to warm pans immediately starts spreading and will create paper-thin, crispy cookies.
Leaving out the parchment paper: Use of parchment paper or silicone baking mats prevents over-browning from happening on the bottom and makes it easier to remove cookies — so softness persists throughout.

Frequently Asked Questions
Why do my cookies become hard after cooling?
Cookies harden upon cooling because they dry out, losing moisture. As cookies cool, they release steam and moisture into the air, becoming more crunchy. This is one reason you should store in an airtight container. Plus, if the cookies were overbaked to begin with, they’ll keep hardening as you let them cool (since there wasn’t enough moisture in them to start).
Is there any way to soften cookies that have hardened?
Yes! Put the hard cookies in a sealable container with a fresh piece of bread for 12-24 hours. The cookies will take on the moisture of the bread. Also, you can gently warm a stack of cookies at a time in the microwave for 10-15 seconds, keeping a damp towel nearby (don’t put it on the cookie but a few inches away) to create steam to soften them instantly.
How long do soft cookies keep?
Soft cookies will keep at room temperature for 5-7 days if stored in an airtight container. Stored in the refrigerator, cookies will remain fresh for 2 weeks, but I’ve found the cold can occasionally make them harder. Cookies can be frozen for up to 3 months.
Does butter instead of margarine make cookies softer?
Real butter does make a difference in texture and taste over margarine. Butter has a lower melting point, and also includes milk solids that help brown your food and add to development of flavor. Margarine has more water and other fats that don’t result in the same type of tender, chewy texture.
What’s the perfect temperature for baking soft cookies?
The vast majority of soft cookies should be baked at 350°F (177°C). This moderate heat is what allows cookies to bake all the way through without over-browning. Some recipes call for heating your oven to 325°F (for extra-thick cookies) or 375°F (for crispy-edge, soft-centered ones). By all means, go with your own recipe but keep close track on the visual signs of being done.
Is it possible to freeze cookie dough and bake them at a later date?
Absolutely! Freezing cookie dough is the best way to keep it fresh while saving time. Divide dough into balls, freeze on a baking sheet until hard, then pack in freezer bags. Bake directly from frozen—just add 1-2 minutes to the baking time.
Why do my cookies spread out and become flat?
Too much spread occurs when dough is too warm, has too much butter or sugar, not enough flour, or the leavening is old. Do be sure to chill the dough, measure accurately and use fresh baking powder or soda. Also make sure your butter isn’t super melted when the recipe calls for softened butter (unless you are going for the chewy cookie and using melted butter on purpose).
Do I have to use parchment paper or can I grease the pan?
I recommend parchment paper or silicone baking mats over greasing. Greased pans can make cookies spread out more and brown faster on the bottom, making them possibly crispier than desired. Parchment paper evenly distributes the heat and makes cookies easily removable.
Bringing It All Together
Whipping up soft and chewy cookies isn’t magic — it’s a bit of science mixed with some good technique. In learning how ingredients work with one another, and to what end various techniques affect cookie texture, you can make cookies that are soft and chewy without fail.
Remember these lessons: Pick brown sugar for moisture, add an extra yolk for richness, use melted butter for density, chill your dough for thickness, pull cookies out early to prevent overbaking, add cornstarch for tenderness and store properly to keep them soft. Every method has a role to play in the perfect cookie experience.
The great virtue of these methods is that they’re versatile. You can use them with almost any cookie recipe under the sun, whether it’s a classic chocolate chip or an oatmeal raisin or a peanut butter. Begin with one or two, experiment and see how they transform your baking before accumulating more over time.
Baking is part art, part science, and these seven tried-and-true techniques provide a scientific foundation while allowing ample room for artistic expression. Feel free to play around and mix and match the combo of your choice, ratio it out using what you personally like and add your magic! Maintain a baking journal to keep records about what is successful in your kitchen, with your particular oven, and the ingredients used in recipes that you have experimented with.
Then the next time you bake cookies and hit that sweet-spot combo of softness and chewiness, you’ll be able to explain exactly why. You’ll be empowered with the knowledge to repeat that success over and over again. Whether you’re baking for family, friends or simply yourself, these skills will guarantee that you are the person everyone thinks of when it’s time to bake cookies! Now take out that mixing bowl, preheat your oven and let’s make the softest, chewiest cookies of your life.